Installation Instructions for rear steps - Denago Nomad XL
- 1 day ago
- 1 min read
These are installation instructions for the NXTMOD rear steps, specifically for the Denago Nomad XL golf cart.
Link to purchase: https://krmnxtmod.com/products/nxtmod-nomad-rear-steps
Download PDF Instructions by clicking the file below:
Index
Preparation
Installing the rear steps
Included:
Two rear steps
Tools/Equipment Required:
10MM socket wrench
Preparation
Establish a clean and clear workspace.
Open the package and remove the two rear steps.
Gather required tools, as listed above.
Installing the rear steps
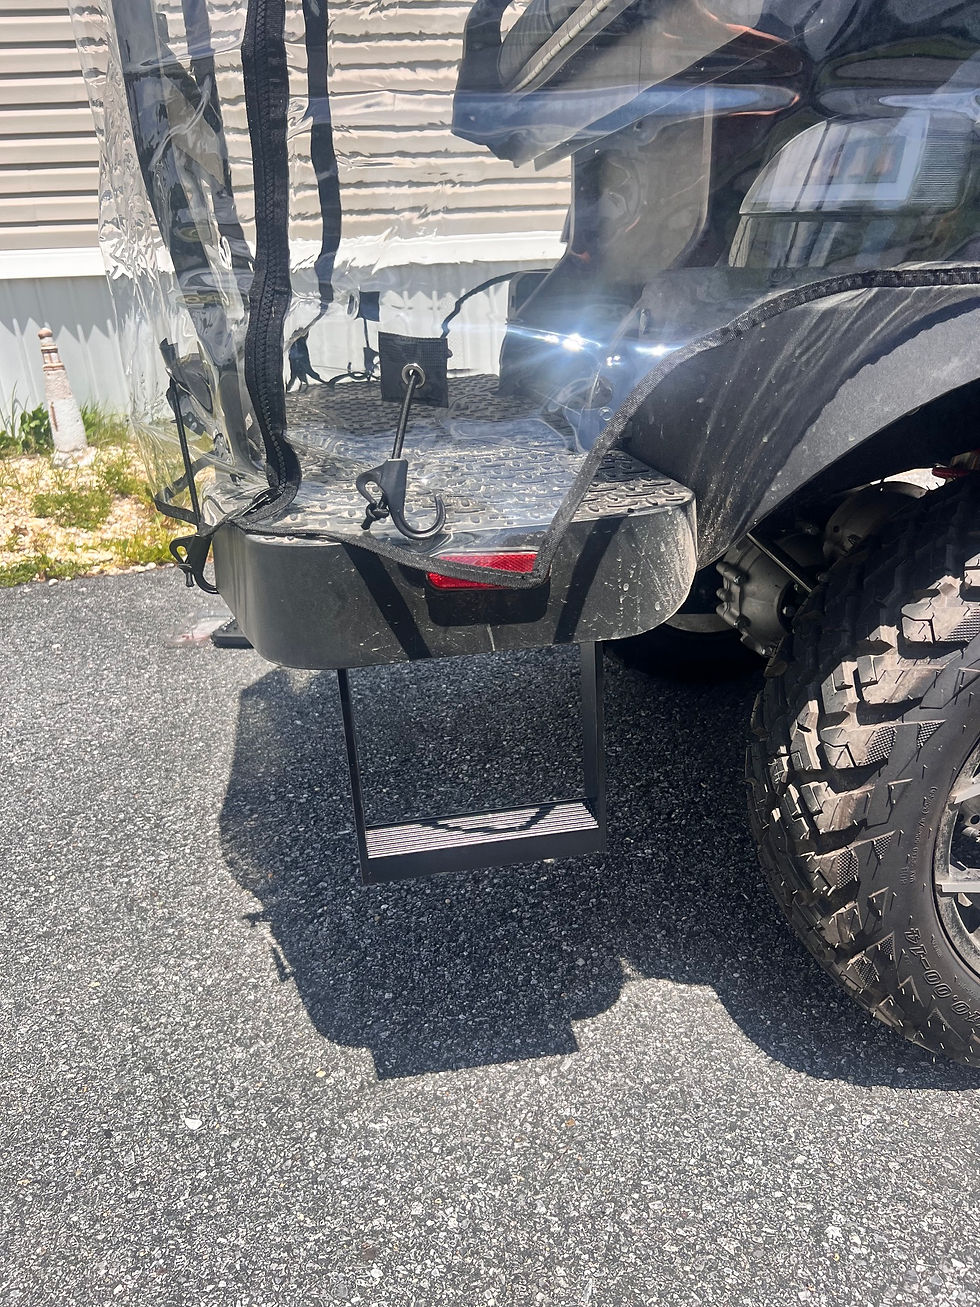
The steps will be mounted under the rear floor of the cart.
Under the floor of the back seat, locate the two bolts attached to the framing of the floor (see Figure 1).

Using a 10MM socket wrench, remove the nut and washer from the two bolts. Do not discard or lose these as they will be re-used.
Pick up either of the two steps (they are the same) to install.
Align the holes at the top of the step to the bolts on the cart (see Figure 2 and Figure 3).
Note: Be careful not to push the bolts back up into the framing of the cart as this will make it difficult to re-attach the washer and bolt.
Re-using the washer and nut that were just removed, attach the step to the cart (see Figure 2 and Figure 3).


Tighten both nuts firmly onto the bolts.
Repeat steps 1-8 on the other side of the cart (see Figure 4).

Installation of the steps complete (see Figure 5).


Comments