Installation Instructions for drop over enclosure - Denago Nomad XL
- 2 days ago
- 5 min read
Updated: 1 day ago
These are installation instructions for the NXTMOD Drop Over Enclosure, specifically for the Denago Nomad XL golf cart.
Link to purchase: 2025 Denago Nomad Drop Over Enclosure – NXT MOD
Download PDF Instructions by clicking the file below:
Index
Preparation
Installing the roof cover
Installing the driver side wall
Installing the passenger side wall
Installing the rear wall
Included:
One roof cover
One driver side enclosure
One passenger side enclosure
One rear seat enclosure
Tools/Equipment Required:
Cleaning supplies
Microfiber towel
Preparation
Establish a clean and clear workspace.
Open the package and remove the four (4) pieces, as listed above.
Installing the roof cover
Note: This portion is easiest with two people, but can be done with one
Completely unfold the roof cover. This is the solid black piece that was shipped along with the rest of the materials.
Locate the front and rear of the cover. The front will have a piece of Velcro in the center with a piece of adhesive on it (which will be attached later), and the rear will have a Velcro closure already attached to itself.
Starting at the rear of the cart, lay the cover over the roof (similar to a fitted sheet), and use the elastic bands on the corners to attach it to the cart. Pull the fabric down over the corners (see Figure 1).
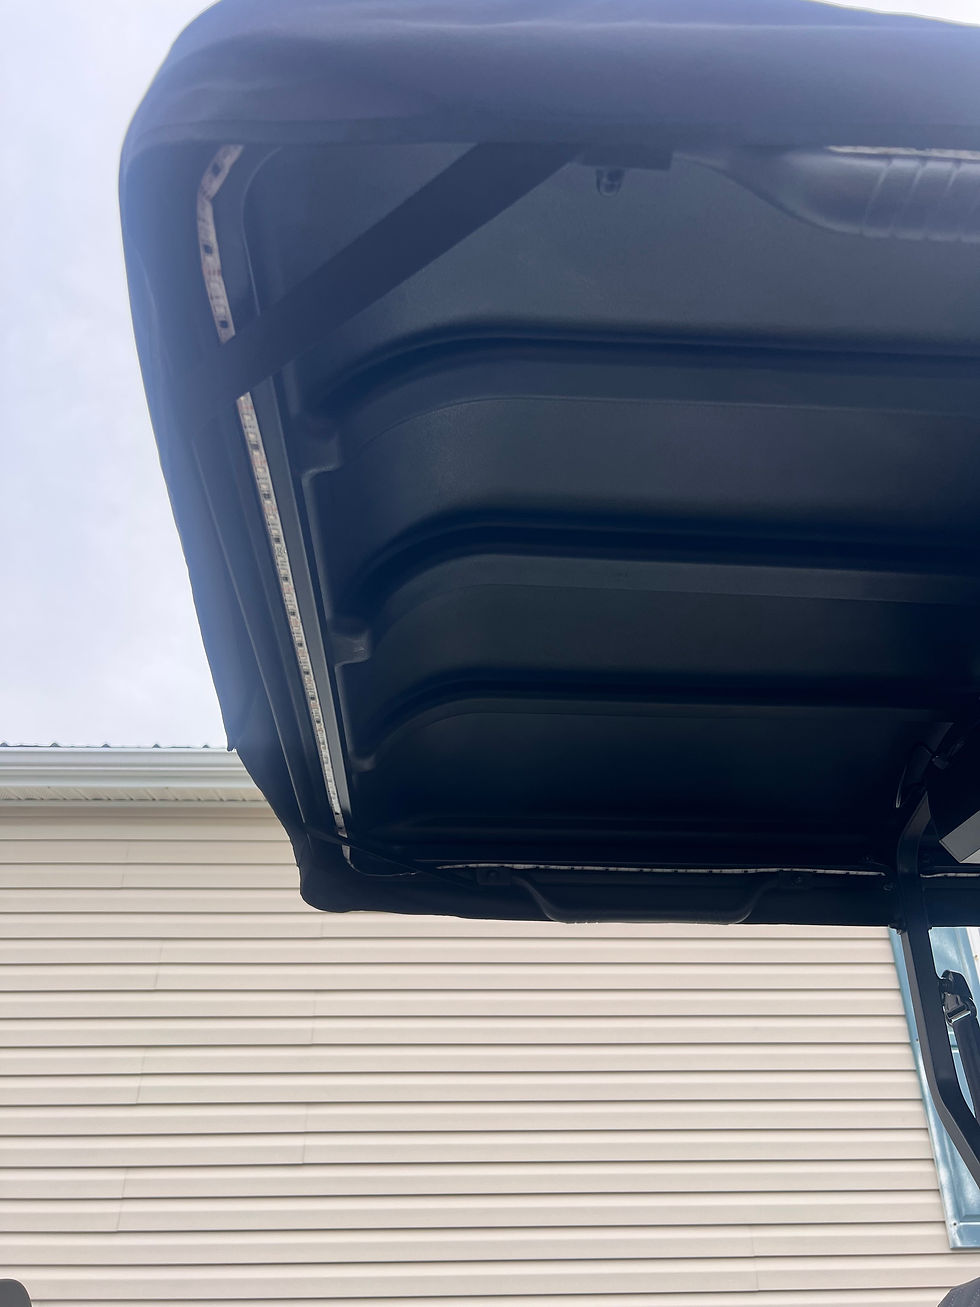
Figure 1
Move to the front of the cart and attach the remaining two corners in the same fashion, using the elastic bands to hook around the corners of the cart roof. Pull the fabric down over the corners.
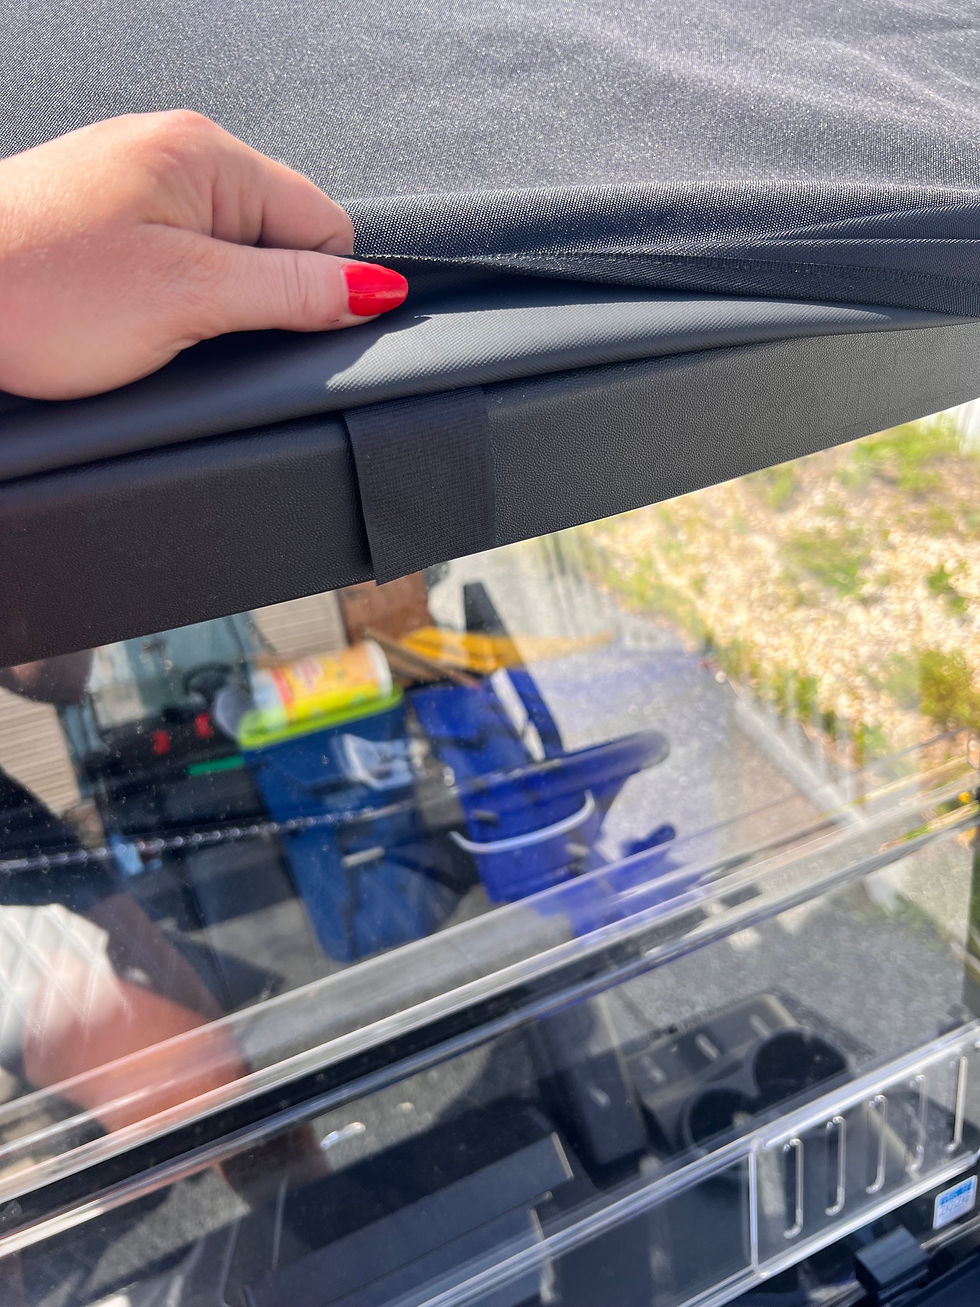
Locate the Velcro at the front of the cart—it is located in the center of the front of the roof, under the fabric.
Thoroughly clean and dry (using a microfiber cloth) the mounting surface on the cart.
Remove the white protective backing from the Velcro’s adhesive side and apply the Velcro to the cart (see Figure 2).
Installation of the roof cover is complete (see Figure 3).

Figure 3
Installing the driver-side wall
Identify and completely unfold the driver-side wall attachment. This piece is clear at the top with black fabric on the bottom. With the lower hooks on the outside, it will have Velcro attachments at the front of the cart, and a zipper at the rear.
Locate the zipper on the roof cover. It should start at the front of the cart and zip towards the back (see Figure 4).

Holding the wall up to the roof cover, start attaching the zipper strand of the roof cover to the zipper strand at the top of the wall. Be sure to start at the front of the cart and work towards the back. Fully zip the two strands together.
Next, locate the three Velcro strips towards the front of the wall. They are on the inside of the wall and will have a protective strip over the adhesive.
Identify where the Velcro will adhere to the cart. The wall should be pulled taut but not so tight as to pull the adhesive off.
Thoroughly clean the mounting surfaces and dry with a microfiber cloth, ensuring no residue or wetness.
Recommend starting with the middle of the three strands (see Figure 4). Remove the adhesive protectant strip.
Apply the Velcro strand adhesive to the cart. Press down firmly to ensure proper adhesion (see Figure 5 and Figure 6).


Locate the lower Velcro strip. Ensure the mounting surface has been thoroughly cleaned and dried (see Figure 7).

Similar to the previous steps, remove the protective backing from the adhesive and apply the Velcro strip to the cart. Press down firmly to ensure proper adhesion.
Moving to the top strand, follow similar procedure and install the remaining Velcro strand.
Note: The “pulling” pressure from the wall being attached may tug at the freshly-applied adhesive. It is recommended to carefully detach the Velcro wall from the cart for a period of time to allow the adhesive to fully set before use.
Locate the hooks (attached with elastic cord) at the bottom of the wall. Hook these to the bottom edge of the cart body (see Figure 8).

Installation of driver side wall complete.
Installing the passenger-side wall
Identify and completely unfold the passenger-side wall attachment. Like the driver wall, this piece is clear at the top with black fabric on the bottom. With the lower hooks on the outside, it will have Velcro attachments at the front of the cart, and a zipper at the rear.
Locate the zipper on the roof cover. It should start at the front of the cart and zip towards the back
Holding the wall up to the roof cover, start attaching the zipper strand of the roof cover to the zipper strand at the top of the wall. Be sure to start at the front of the cart and work towards the back. Fully zip the two strands together.
Next, locate the three Velcro strips towards the front of the wall. They are on the inside of the wall and will have a protective strip over the adhesive.
Identify where the Velcro will adhere to the cart. The wall should be pulled taut but not so tight as to pull the adhesive off.
Thoroughly clean the mounting surfaces and dry with a microfiber cloth, ensuring no residue or wetness.
Recommend starting with the middle of the three strands. Remove the adhesive protectant strip.
Apply the Velcro strand adhesive to the cart. Press down firmly to ensure proper adhesion (see Figure 9).

Locate the lower Velcro strip. Ensure the mounting surface has been thoroughly cleaned and dried (see Figure 10).

Similar to the previous steps, remove the protective backing from the adhesive and apply the Velcro strip to the cart. Press down firmly to ensure proper adhesion.
Moving to the top strand, follow similar procedure and install the remaining Velcro strand.
Note: The “pulling” pressure from the wall being attached may tug at the freshly-applied adhesive. It is recommended to carefully detach the Velcro wall from the cart for a period of time to allow the adhesive to fully set before use.
Locate the hooks (attached with elastic cord) at the bottom of the wall. Hook these to the bottom edge of the cart body.
Installation of the passenger-side wall complete (see Figure 11).

Installing the rear wall
Locate and completely unfold the rear wall. This will be the remaining completely-clear piece.
Locate the zipper start on the roof cover. It will start on the driver’s side of the cart and zip towards the passenger side (see Figure 12).
Note: It may be easier to partially remove the corner of the roof cover from the cart to access the zipper, as shown in Figure 12.

Holding the rear wall up to the cart, start the zipper (it will start on the driver’s side of the cart). Ensure the lower hooks are on the outside of the wall to ensure the correct end of the zipper is connecting to the zipper start.
Fully zipper the top of the wall to the roof cover, finishing on the passenger side of the cart (see Figure 13).

Beginning on either side of the cart, locate the vertical zippers that will attach the rear wall to either of the two front walls.
Starting from the top of the cart, use the zipper strands to attach the rear wall to the front wall of the enclosure (see Figure 14).

Fully zipper the strand to the bottom of the cart.
Repeat steps 6-7 on the other side of the cart to attach the zipper strand on the other side of the cart to the front wall.
Locate the hooks at the bottom of the rear wall. Hook the enclosure wall to the bottom of the cart (see Figure 15 and Figure 16).


Installation of the rear wall and drop over enclosure is complete.
NOTE: Will update later with instructions for rolling up and storing the cover.


Comments