Installation Instructions for LED light kit (top and bottom) - Denago Nomad XL
- May 31
- 6 min read
Updated: Jun 26
These are installation instructions for the NxtMod LED lighting kit (top and bottom), specifically for the Denago Nomad XL golf cart. If you only purchased one set of lights, please refer to the appropriate section.
Link to purchase: Denago Nomad XL OEM Roof Lights / UnderGlow Kit – NXT MOD
Download PDF instructions by clicking link below:
Index
Preparation
Installing the top light strand
Installing the bottom light strands
Preparation
Establish a clean and clear workspace.
You should have received three individually-wrapped LED light strips, as well as a bag with a remote and two harnesses. Keep these items in their individual bags until ready to install each one.
Lift the front seat to view the battery compartment. You should see two plugs on the driver-side wall of the compartment (See Figure 1). Often, these come from the dealer unplugged—plug them back in. It does not matter which wire plugs into which receiver. These two plugs will supply power to the LED light strips.
If they are already plugged in, leave them as is.
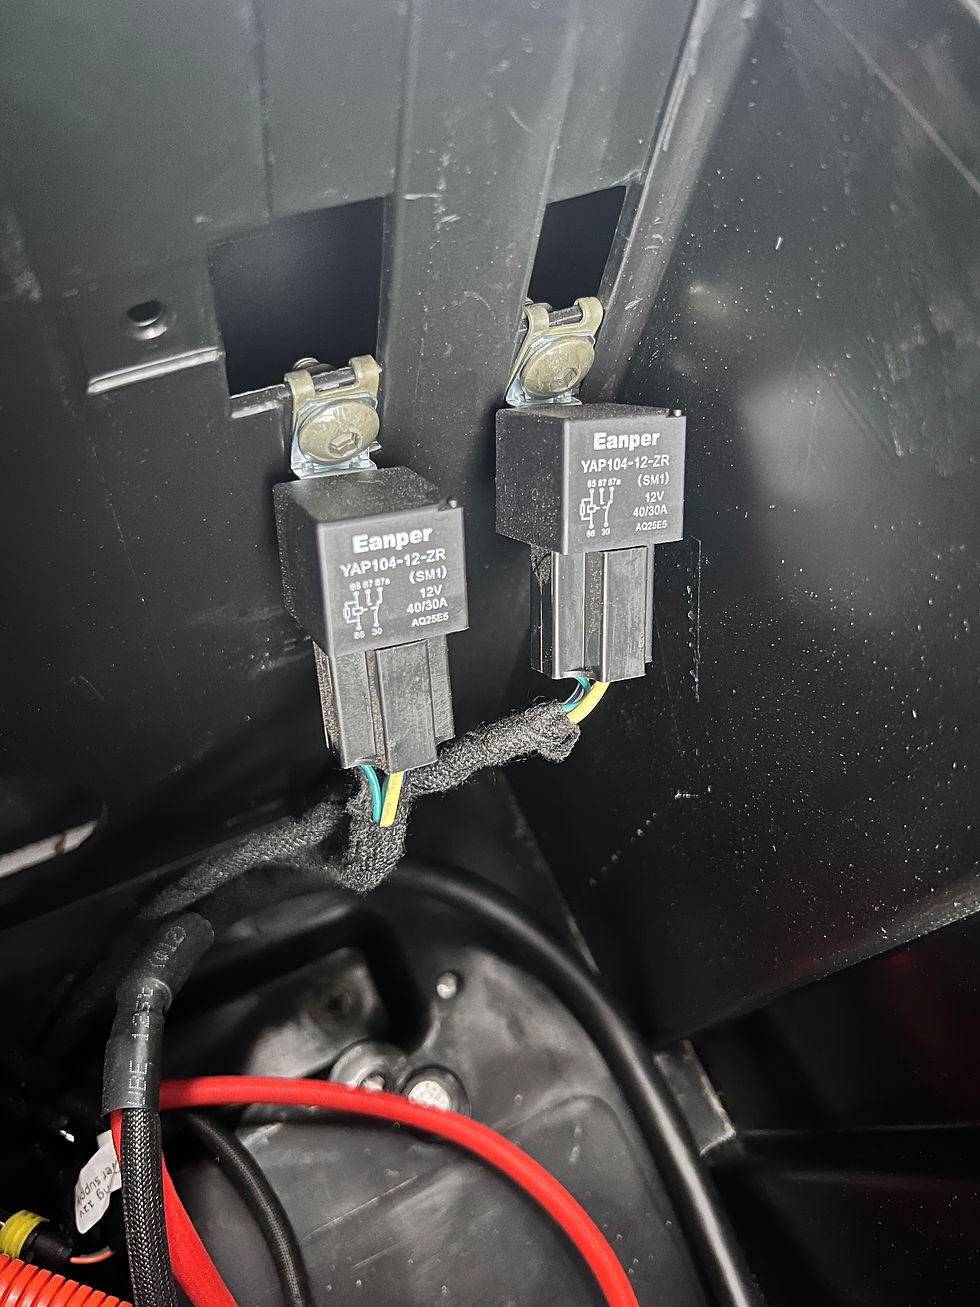
Figure 1
Close the front seat/lid of the battery compartment.
Installing the top light strand
Using a solvent, thoroughly clean the mounting surface for the top light strand. It will be mounted on the bottom of the metal frame supporting the roof rack.
If necessary, use a microfiber cloth or similar material to dry the surface thoroughly. Otherwise, let air dry thoroughly.
Locate the white plug on the passenger side of the cart. It should be mounted on the rear/bottom of the top frame above/behind the front passenger seat (See Figure 2).
(If you have a sound bar installed, it will be close to the passenger-end of the sound bar. It is on the opposite side of the cart as the plug for the sound bar).
Note one side of the plug is labeled with an “L” for “left”, and the other is labeled with an “N” for “neutral”.

Figure 2
Open the package containing the TOP LED light strip (See Figure 3). There should be a remote in this package as well—hold on to this.

Figure 3
Unwind several inches of the strip off of the spool so there is room to maneuver the strand and plug it in.
The beginning of the strip will have 2 stripped-end wires—one red and one black. Plug the red wire into the left side (the side labeled “L”) of the white plug that was just located.
Next, plug the black wire into the right side of the plug (the side labeled “N”).
With a gentle touch, confirm that the two wires have been completely inserted into the plug. They should not come loose.
If they need to be removed for any reason, simply push down on the two tabs until you hear a “click”, then remove the wires while continuing to hold down the tabs.
It is important to make sure they are completely inserted as vibrations from the cart moving must not be able to knock them loose.
Confirm that the lights work and the connection is secure before continuing. On the cart’s touch screen, select the “LED” option (See Figure 4).

Figure 4
Once on the “LED” screen, select “LED Car Body” (see Figure 5).

Figure 5
Click the switch for the top light bar to enable power.
Visually confirm that the light bar has power and is lit up.
Once power is confirmed, continue with installation.
If no power is going to the lights, DO NOT continue with installation. Troubleshooting is required before proceeding.
Working in sections, begin removing the protective red backing from the adhesive on the light strand. Removing this red backing will expose the sticky, adhesive surface that will mount the LED lights to the cart.
Mount the adhesive LED light strand to the metal rail that was cleaned and dried in step 1. Start from the back and work around towards the front of the cart, in a clockwise route (See Figure 6).
NOTE: Carefully ensure placement the FIRST time! Removing and re-aligning the strand will cause it to lose some of its adhesive abilities and it will not stick as well.

Figure 6
After working all the way around the cart, there should be a few inches of overlap as you approach the starting point. This is expected and okay.
Confirm lights are still getting power by switching off/on using the touch screen.
The supplied remote (that should have come in the same bag) can be used to set desired color, settings, etc.
Installation of top lights complete (See Figure 7).

Figure 7
Installing the bottom light strands
Using a solvent, thoroughly clean the mounting surface for the bottom light strand. It will be installed against the plastic under-body of the cart.
If necessary, use a microfiber cloth or similar material to dry the surface thoroughly. Otherwise, let air dry thoroughly.
Open the bag containing the left (driver) side light strip (See Figure 8).
NOTE: This bag should contain both a light strip as well as a wiring harness.

Figure 8
Open the battery compartment by lifting the driver’s bench.
Locate the white plug in the compartment. It should be on the wall, near the two plugs that were plugged in in the Preparation steps.
Open the wiring harness provided in the bag.
Using the stripped ends of the wires, plug the red wire into the left side of the white plug (labeled “L”).
Plug the black wire into the right side (labeled “N”).
With a gentle touch, confirm that the two wires have been completely inserted into the plug. They should not come loose.
If they need to be removed for any reason, simply push down on the two tabs until you hear a “click”, then remove the wires while continuing to hold down the tabs.
It is important to make sure they are completely inserted as vibrations from the cart moving must not be able to knock them loose.
Remove the LED light strip from the bag, and locate the wiring harness at the beginning of the LED light strip.
Feed the light strip harness through the hole in the bottom of the battery compartment, starting from below the cart, and entering into the compartment.
Plug the LED lights into the wiring harness that was just installed (See Figure 9 and Figure 10).

Figure 9

Figure 10
Confirm that the LED light strip has power by navigating on the touch screen to the “LED Car Body” menu and enabling the lower/bottom lights.
Once power is confirmed, continue with installation.
If no power is going to the lights, DO NOT continue with installation. Troubleshooting is required before proceeding.
Working underneath the cart, begin working in sections—remove the red protective backing to reveal the adhesive on the light strand, then press it against the underbody of the cart to attach. Start towards the FRONT of the cart and work towards the back (See Figure 11).
NOTE: Carefully ensure placement the FIRST time! Removing and re-aligning the strand will cause it to lose some of its adhesive abilities and it will not stick as well.

Figure 11
Once the strand is installed, again confirm it has power.
Open the second bag containing the right (passenger) side light strip (see Figure 12).

Figure 12
Locate the harness at the beginning of the light strip.
Again, feed this harness through a hole in the bottom of the battery compartment, starting from underneath the cart and entering into the compartment.
Plug the wiring harness into the dual harness that was attached to the cart in steps 6-7.
Confirm that the light strand has power.
NOTE: The bottom light strand on the touch screen may need to be turned off and back on to get power.
If the strand is not getting power, do NOT proceed with installation. Troubleshooting may be required.
Working underneath the cart, again work in sections to install the strand, starting at the front of the cart and working towards the rear (See Figure 13)
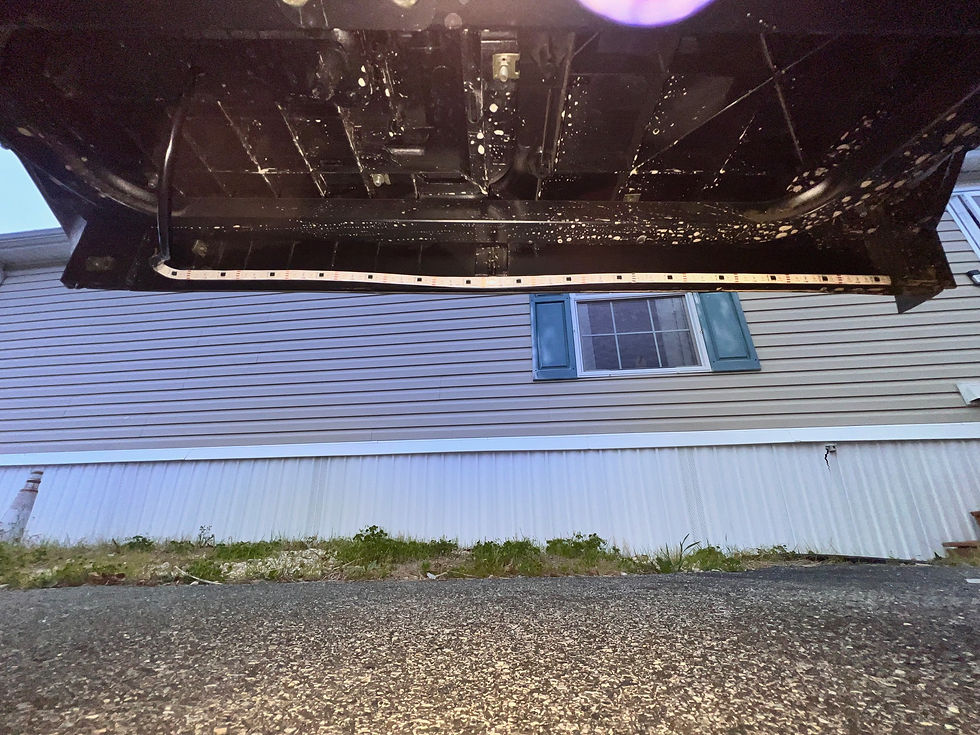
Figure 13
Once installation is complete, again confirm the lights still have power.
Lower the driver’s seat bench back down.
Installation of the lower lights is complete (See Figure 14).
The supplied remote (bagged separately) can be used to control color, settings, etc.
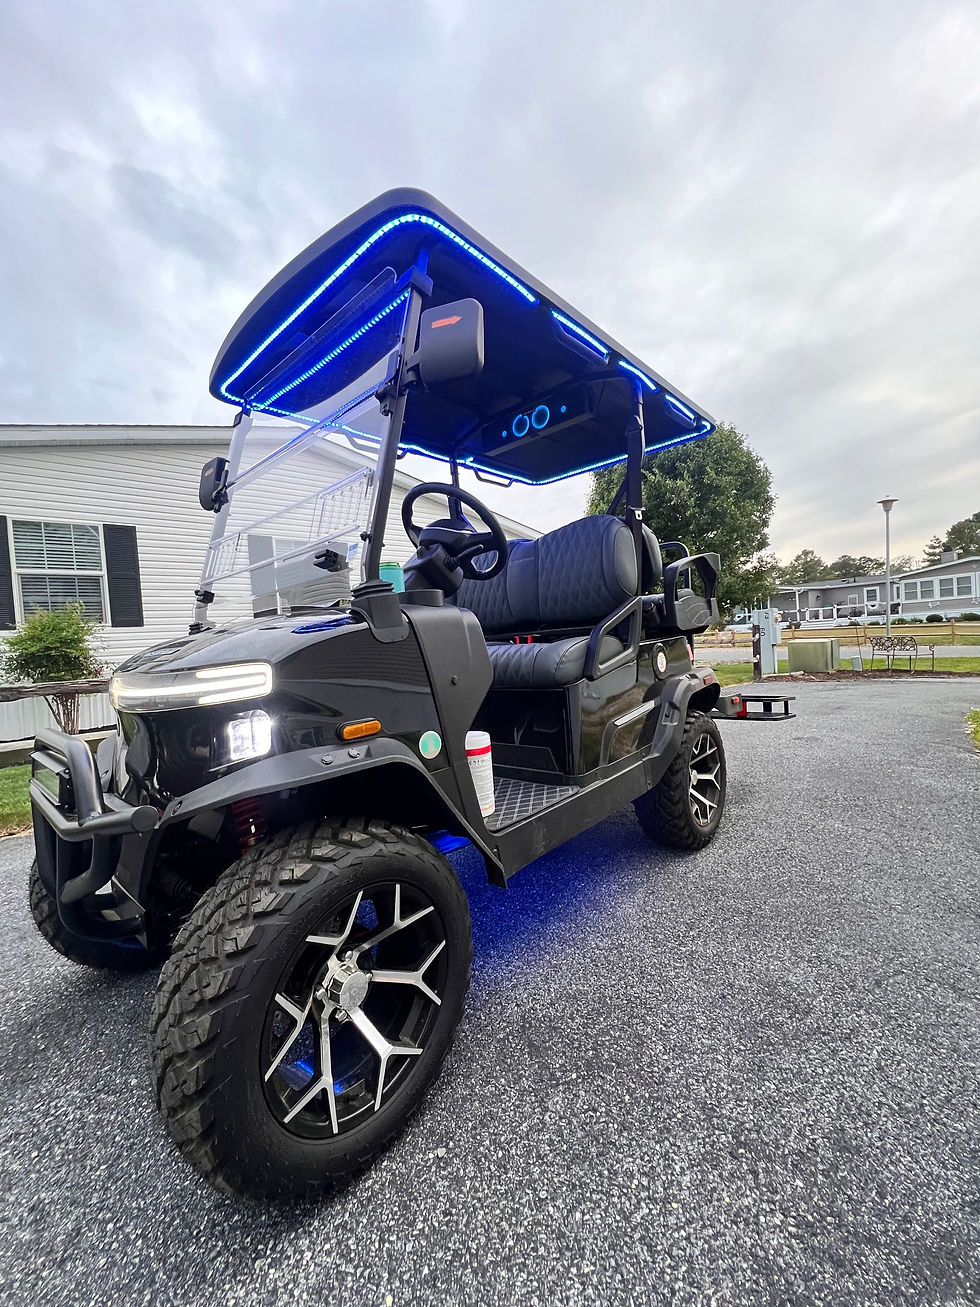
Figure 14
Instructions by Katie Martin
Visit www.katiemartin.com for contact info for troubleshooting issues-- will do my best to help


Comments